Classic Shepherd’s Pie

As the days get cooler, we tend to crave comfort foods that warm us on the inside and evoke a feeling of coziness. This is one of those dishes that brings ultimate comfort, easily pleases both the young and the old, easy to eat on for several days as leftovers, or even freeze for a later time. I’m glad I found this particular recipe, because it truly is one of the best I’ve ever made. I think this recipe is one that should be kept in every household, for a delicious classic to whip on a chilly fall or winter evening. Happy Cooking!

Ingredients for Ground Beef Filling

  • 2½ tbsp olive oil
  • 1½ cups yellow onion, diced
  • 2 lbs 80/20 ground beef
  • 1 tsp salt
  • 1½ tsp thyme leaves
  • 1 tsp rosemary leaves
  • 2 tsp parsley flakes
  • 2 tsp ground black pepper
  • 2 tbsp Worcestershire sauce
  • 3 cloves garlic, minced
  • ⅓ cup all-purpose flour
  • ¼ cup ketchup
  • 2 cups beef broth
  • 1 cup frozen green peas
  • 1 cup diced carrots
  • 1 cup frozen corn kernels

Ingredients for Cheesy Potato Topping

  • 4 large russet potatoes or 8 small / medium russet potatoes, cubed into small squares
  • 12 tbsp unsalted butter
  • ⅔ cup half & half
  • 1 tsp garlic powder
  • ½ tsp ground black pepper
  • 1½ tsp paprika
  • 1/3 cup cheddar cheese, grated

Instructions for the Ground Beef Filling

  • Preheat oven to 400 Degrees F and coat a 13×9 baking dish with cooking spray. Then set aside.
  • In a large skillet over medium-high heat add in olive oil. Once the oil is hot add the onions and cook 3-4 minutes, stirring occasionally.
  • Add the ground beef, parsley, rosemary, thyme, salt, and pepper. Cook for 6-8 minutes and break apart the ground beef with meat chopper or spoon. Stir occasionally until meat is completely browned.
  • Add in garlic and cook for an addition 1 minute.
  • Add the Worcestershire sauce, flour and ketchup to the ground beef mixture. Stir until fully incorporated and cook for 1 minute.
  • Add the beef broth, frozen peas and carrots and frozen corn kernels. Cook until the beef broth begins to boil. Then, reduce heat and let simmer for 4-5 minutes. Stir occasionally.
  • In the prepared baking dish spread out the ground beef filling. Make sure to spread it out into an even layer.

Instructions for the Cheesy Potato Topping

  • Peel and cut potatoes into 3/4 inch cubes. Place the potatoes in a large pot. Cover the potatoes with water and add 1/4 teaspoon of salt. Bring the water to a boil then reduce to a simmer. Cook the potatoes until the can be smashed with a fork. Cook time will be 10-15 minutes.
  • Drain the potatoes and add them to a stand mixer. If you don’t have a mixer a hand mixer or potato smasher will work fine.
  • Then, cut the butter stick into 1 tablespoon pieces and spread them evenly on top of the potatoes
  • Next, add the half & half, garlic powder, salt and black pepper and mix until the potatoes are smooth and creamy.
  • Scoop the potatoes on top of the ground beef filling. Carefully spread them into a even layer.
  • Sprinkle the paprika over the potatoes evenly. Then, add the cheddar cheese on top of the potatoes.
  • Place the in the oven and bake at 400 degrees F. Place a baking sheet on the shelf under the pie. I have found that this recipe will sometimes boil over and the baking sheet will save your oven. Cook for 25-30 minutes. 
  • Then, let cool for 10 minutes before serving and garnish with fresh chopped parsley.

Logan’s Mochatini

My husband is a spirits specialist and is always coming up with his own cocktails, many of which are twists on classics. This is similar to an espresso martini, but in my opinion, so much better! For an after dinner drink, or just an indulgent treat, this Mochatini is perfect. Serve it with shaved chocolate on top as a garnish, and you will not be disappointed. Cheers!

Ingredients

Instructions

  • Brew your coffee or espresso with your preferred method, set aside.
  • Gather your spirits, cocktail shaker, and jigger.
  • Pour your espresso in your cocktail shaker, top with 2 oz of Irish cream, 2 oz chocolate liqueur, and 1 oz bourbon.
  • Put a handful of ice or one large whiskey cube, broken, into your cocktail shaker, and shake until well chilled.
  • Pour your cocktail mixture into a martini glass or glass of your choice.
  • With a grater, grate your chocolate finely atop your drink, now it is ready to serve!

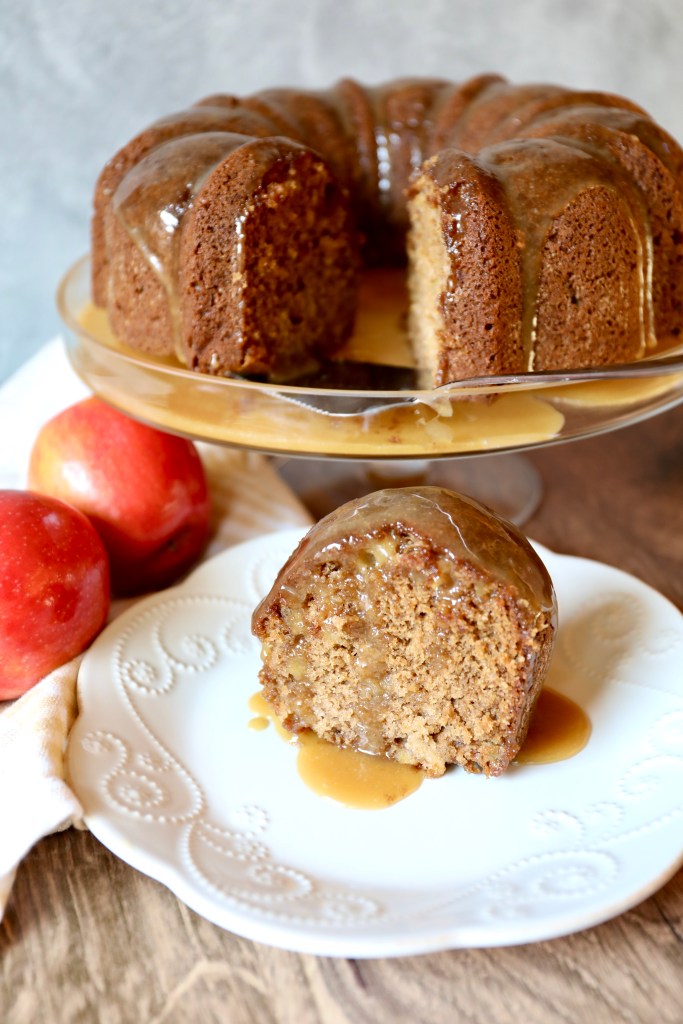
Brown Sugar Glazed Apple Bundt Cake

It’s fall y’all! With all the warm and cozy recipes we love to make, apples, pumpkins, cinnamon, nutmeg, and clove are usually the in the forefront. This cake was giving autumnal energy, and made my kitchen smell absolutely heavenly. When I opened the oven to check the doneness, a waft of fragrance hit me and immediately took me back to my Grandmother’s kitchen as so many of her baked goods contained cinnamon. This can be made in a loaf pan, a bundt pan, or even a muffin tin, adjusting bake times accordingly. I had it warm and it was exceptional, and even enjoyed a small slice room temperature with coffee in the morning. I used 1 large Honeycrisp and 2 small Pink Lady apples. I think either is fine for this recipe. Granny Smith would also work well. Happy Baking!

For the Apple Cake

  • 3 cups all-purpose flour
  • 1 teaspoon baking soda
  • 3 teaspoons ground cinnamon
  • 1/2 teaspoon ground nutmeg
  • 1/2 teaspoon salt
  • 1 and 1/4 cups vegetable oil
  • 1/2 cup sour cream
  • 1 and 1/4 cups packed light brown sugar
  • 1/2 cup granulated sugar
  • 3 large eggs
  • 1 Tablespoon pure vanilla extract
  • 3 cups peeled and chopped (finely) apples, about 2–3 large apples

For the Brown Sugar Glaze

  • 1 cup packed light brown sugar
  • 1/4 cup (1/2 stick) unsalted butter
  • 1/2 cup heavy cream
  • 1/2 cup confectioners sugar

Instructions

  • Preheat oven to 325°F. Spray a 10-12 cup Bundt pan with nonstick spray. Set aside.
  • Whisk the flour, baking soda, cinnamon, nutmeg, and salt together in a large bowl until combined.
  • Set aside. In a medium bowl, whisk the oil, sour cream, brown sugar, granulated sugar, eggs, and vanilla together until combined and creamy. Pour the wet ingredients into the dry ingredients and slowly whisk until no large lumps remain. Fold in the apple chunks.
  • Spoon the thick batter into the prepared bundt pan. Bake for 55–75 minutes or until a toothpick inserted in the cake comes out clean. The baking times may vary depending on your oven and the size of pan used.
  • Brown Sugar Glaze: As the cake cools, prepare the brown sugar glaze. Combine the butter, brown sugar, and heavy cream in a medium saucepan over medium heat. Stir constantly until the butter has melted, and then stop stirring and let the mixture come to a rapid boil. Boil for 1 minute. Turn the heat down to low, give it a quick stir, and let simmer for 1 minute. Remove from heat and whisk in the sifted confectioners’ sugar. Allow glaze to cool and slightly thicken for at least 30 minutes. Spoon glaze over the cake right before serving. (Cake can still be warm when glazing.) If your glaze thickened up too much as it cooled, warm in the microwave for 15 seconds and stir until smooth.
  • Cover leftovers and store at room temperature for 3 days or in the refrigerator for up to 5 days.

Better than Anyone’s Pea Salad

The classic pea salad. A southern staple, if you will. You see it at family picnics, at showers for brides and babies, and the cafeteria line at Luby’s. It makes a tasty and light side to bring along to any potluck or even a funeral reception to comfort loved ones. But what makes some pea salads just “ok” vs. a pea salad that is so good you seek out the person who made it and ask them for the recipe? THIS is that recipe. The one that beats all the other pea salads in the south. Save it, share it, enjoy it!

Ingredients

  • 1 16 ounce package frozen sweet peas, thawed and uncooked
  • 2-3 medium/large eggs, hard boiled and chopped
  • 6 slices of bacon, cooked crisp and chopped (extra bacon never hurt nobody)
  • 1/2 cup chopped green onion
  • 1 cup shredded cheddar cheese, mild or medium sharp
  • 1/4 teaspoon black pepper
  • 1/2 teaspoon salt
  • 1/4 teaspoon garlic powder
  • 1/2 cup celery chopped
  • 1/2 cup mayonnaise
  • 1/2 cup sour cream

Instructions

  • Combine uncooked, thawed peas (thaw in warm water for a few minutes or leave on counter for an hour) eggs, bacon, green onion, cheese, and celery in a salad bowl. In a separate bowl, prepare the dressing, add the mayonnaise and sour cream and then mix in pepper, salt, and garlic powder. Combine dressing with pea mixture until fully mixed. Cover and place in refrigerator for a couple of hours. Makes 4-6 servings. Double or triple for a larger group.

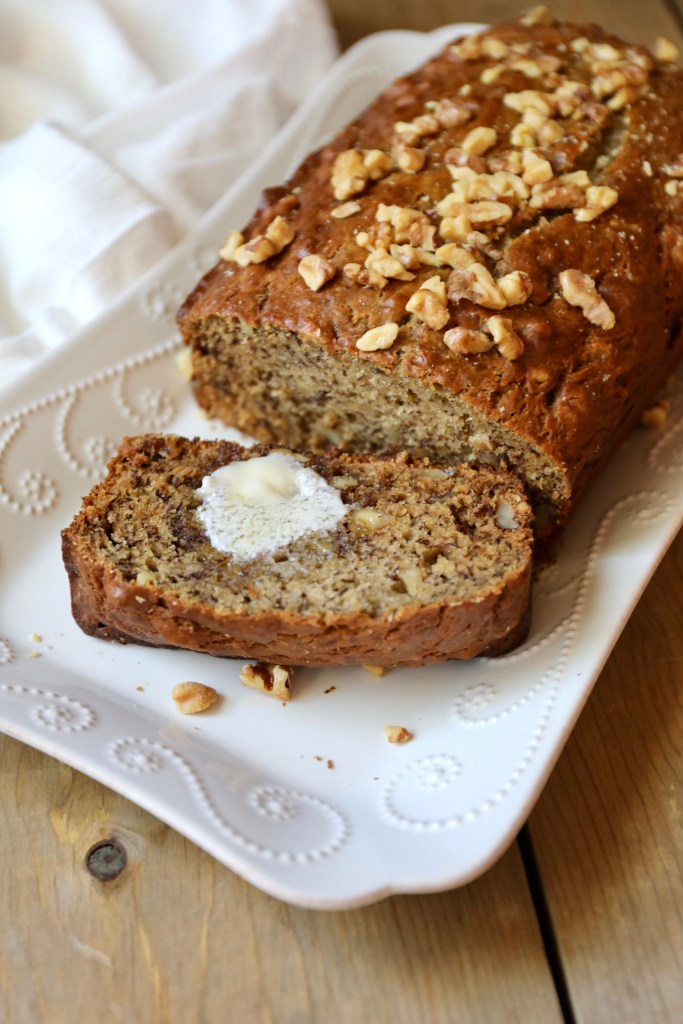
Banana Nut Bread

You walk into your Grandmother’s kitchen and smell butter and cinnamon. The glorious inviting smells envelops you like a warm hug. She goes, “just baking some banana bread with those old bananas your grandfather let get too ripe!” She takes it out of the oven, steaming goodness, and sets it on the counter. She says, “would you like a piece with some milk?” you don’t hesitate for a single second. She dabs some butter on your piece and you watch it slowly melt on the top. You feel whole, loved, and comforted.

Many of us have memories just like this one… the classic banana nut bread is one that cannot be beat. Whether you need to get rid of over-ripened bananas and put them to good use, or you bake it with intentions like bringing a glimpse of comfort to a friend who’s going through a hard time. This is an ol’ trusty, save it in your go-to box of recipes and you’ll thank me later. May or may not be better than Grandma’s, but will not disappoint.

Tip on getting your bananas ripe if you want to make a loaf in a jiffy and don’t have any, you can use fresh bananas and bake them at 300°F on a sheet pan for 30 minutes (in the peels).

Ingredients

  • 1 ½ cups all-purpose flour
  • Pinch of nutmeg
  • Pinch of cinnamon
  • 1 teaspoon baking soda
  • ¼ teaspoon salt
  • 1 ½ cups mashed banana (about 3 large or 4 medium very ripe bananas)
  • 6 tablespoons salted butter, melted and slightly cooled
  • ¾ cup sugar
  • 1 egg
  • 1 teaspoon vanilla extract
  • 1 cup chopped walnuts

Instructions

  • Preheat oven to 350°F. Grease an 8½ x 4½-inch loaf pan and set aside. (I like using Baker’s Joy pan spray)
  • In a medium bowl, sift or whisk together flour, nutmeg, cinnamon, baking soda and salt. Set aside.
  • In a separate large bowl, whisk together mashed banana, melted butter, sugar, egg and vanilla extract.
  • Gradually add the dry ingredients to the wet ingredients, stirring just until combined. Fold in the walnuts.
  • Pour batter into prepared loaf pan. Bake until the bread is golden brown and a toothpick inserted in the center comes out clean, about 50 minutes. Do not overbake.
  • Remove from the oven, unmold from the pan, and cool completely on a wire rack before slicing and serving.

Tip: Wrap the loaf in plastic wrap while still warm, the steam will be trapped and it will be extra moist when you decide to have a slice later on.

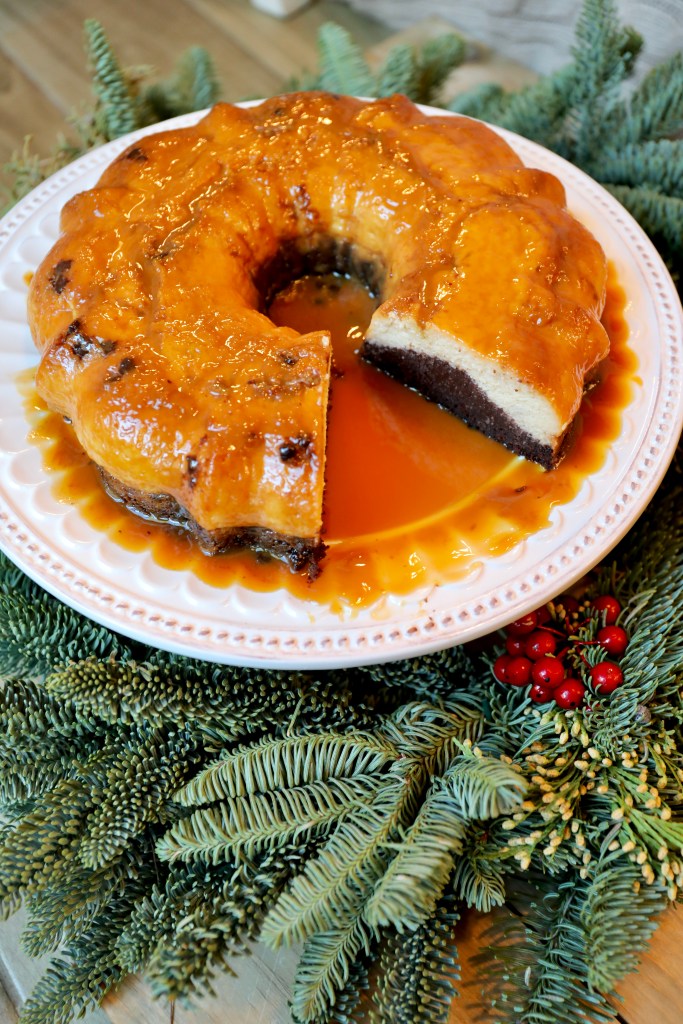
Chocoflan

I remember the first time I tasted Chocoflan. I must have been around 12 years old at my best friend Misha’s birthday celebration. I grew up in south Texas right on the border of Mexico, so I was no stranger to delicious Mexican cuisine. I was always a fan of flan on its own, and of course, chocolate cake. When I tasted this magnificent creation, I think I had an out of body experience. I remember thinking it was the best dessert I’d ever tasted in my whole life! I would think about Chocoflan all year until Misha’s birthday on March 14th, then I would get the glorious pleasure of eating it once again. When I became really interested in learning how to cook, specifically, cook my favorite things, I was determined to find a recipe that tasted just like that first memory. I tried a few different ones, and this one was the winner. I have been making this recipe for years now, usually around Christmastime. My family asks for it and people ooh and ahh about how cool it is that the flan is on top of the cake. I don’t do anything special, it’s just a magical creation all on its own. Well, scientifically, the volume of the flan mixture is more dense than the cake batter, therefore it sinks to the bottom of the bundt during the baking process, and when flipped after baking, it is on top. Food science, magic, same difference. I am so excited to finally make this for my blog and share it with all of you, it truly is one of my all time favorite recipes and something very near and dear to my heart. I hope all of you enjoy the holiday season with those you love, eating, laughing, and being merry!

Ingredients

  • 1 box of chocolate cake mix and ingredients according to cake instructions (eggs, oil, water)
  • ½ cup of jarred caramel
  • 4 eggs
  • 4 oz. (1/2 block) cream cheese, softened
  • 1 (14 oz.) can sweetened condensed milk
  • 1 (12 oz.) can evaporated milk
  • 1 tsp. vanilla extract

Instructions

  1. Preheat oven to 350° F and put rack in the middle. Oil or spray a large (14.5 cup) Bundt pan.
  2. Pour caramel in the pan and tilt side to side to evenly coat. Set aside.
  3. In a large bowl mix chocolate cake according to package instructions with an electric mixer and set aside.
  4. To soften the cream cheese, microwave unwrapped 15 seconds.
  5. In a blender or food processor blend the 4 eggs, cream cheese, condensed milk, evaporated milk, and vanilla to make the flan.
  6. Pour chocolate cake batter over the caramel.
  7. Pour flan on top of cake batter. While baking, the flan will sink between the chocolate cake and caramel.
  8. Place the pan inside a roasting pan or large baking dish. Pour hot water in the roasting pan so it’s 1 inch deep (to make a water bath).
  9. Cover Bundt pan with aluminum foil and bake 1 hour. Uncover and cook 30-40 minutes or until a knife inserted into the middle comes out clean. Remove cake from the roasting pan and allow to cool completely, about 1 hour.
  10. Put a large plate or cake plate inverted over the top of the Bundt pan. Grip the two together and flip over. Store in refrigerator. Serve chilled.

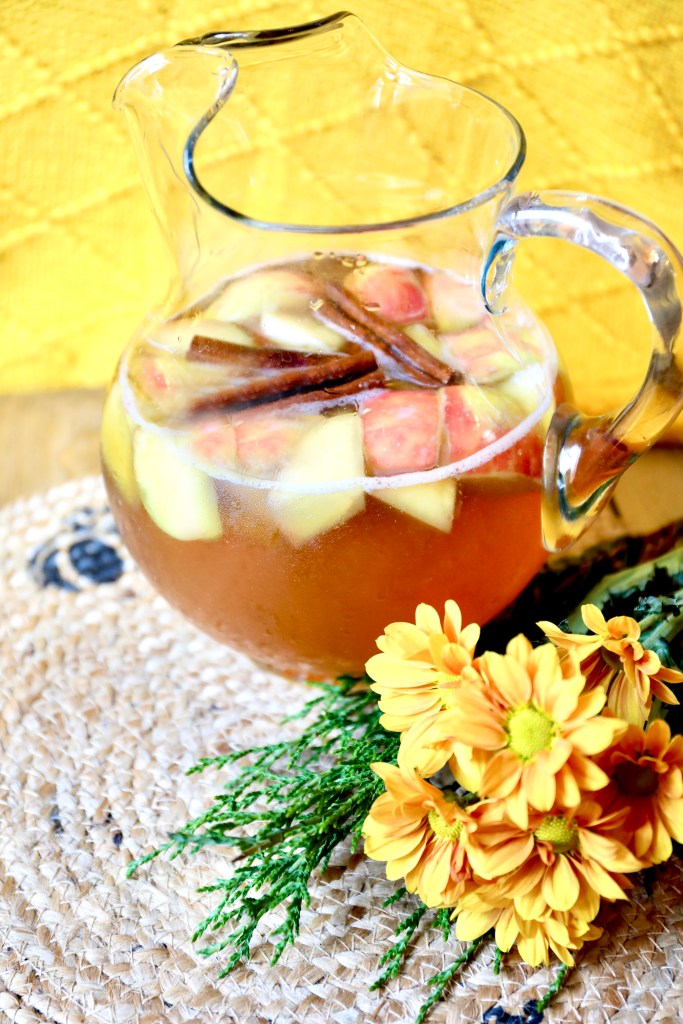
Sparkling Apple Bourbon Sangria

This beverage is the perfect fall inspired spritzer for your holiday menu. Its refreshing and full of flavor, easy to throw together in a pitcher for a crowd of family and friends!

Ingredients

  •  750 mL bottle of Chardonnay, chilled
  • 3/4 C Bourbon Whiskey
  • 1/4 C Grade A Maple Syrup
  • 4 Cinnamon Sticks
  • 1, 1″ Knob of Fresh Ginger, skinned and quartered
  • 2 Honeycrisp or Gala apples, cored and quartered
  • 1.5 cup apple juice
  • 750 mL bottle dry sparkling wine

Instructions

  • In a pitcher, add the apple juice, chardonnay, bourbon, maple syrup, cinnamon sticks, ginger and apples.
  • Stir to incorporate flavors. Cover and chill for at least two hours or up to 24 hours.
  • Just before serving, pour the sparkling wine in the pitcher or individually to top off ice filled glasses. 

Pumpkin Cream Rigatoni

In the fall, we love using pumpkin for all things tasty, but most generally in desserts. I really wanted to find a delicious savory pumpkin recipe that I could make every year during the autumn time. Upon searching the World Wide Web, I found this recipe and made a few adjustments to make it my own. This dish is absolutely a hit. It’s easy to make and pairs nicely with chicken or pork, we did both pan seared chicken thighs as well as an herbed roasted pork loin, the two times we made it this season. And don’t forget, shredded parmesan on top!

Ingredients

  • 4 tablespoons butter
  • 4-6 cloves garlic, minced
  • 1, 15 oz can pumpkin puree
  • 2 cups chicken broth
  • 2 cups heavy cream
  • 2–4 teaspoons salt
  • juice of 1 whole lemon, approx. 3 tablespoons
  • 1 teaspoon thyme, dried or fresh
  • 1 teaspoon rosemary, dried or fresh
  • 1/2 teaspoon ground black pepper
  • 1 lb. rigatoni (you will have extra sauce, will be enough for up to 1.5-2 lbs rigatoni if serving a crowd)

Instructions

  • Cook according to package directions. reserve 1/2 cup pasta water. Drain in colander.
  • While the pasta cooks, heat the butter in a skillet over low heat. Add the garlic and saute until fragrant.
  • Add the pumpkin and broth, simmer until smooth. Add the cream, salt, pepper, thyme, and rosemary, simmer until the sauce coats the back of a spoon. Add the lemon juice. Add cooked pasta to the sauce.
  • Serve pasta in shallow bowls with a sprinkle of shredded parmesan.

Logan’s Shrimp and Sausage Gumbo

Gumbo, one of the most iconic dishes that defines cajun cooking. Originating in Louisiana from creole influence, over the centuries everyone has developed their own take on their style of cooking gumbo. With every gumbo having similarities and many of the same ingredients and spices, different variations and styles is what makes this dish so unique and special. No matter how it’s made, its unbelievably comforting and delicious. This gumbo recipe is one that my husband Logan has perfected over the years, combining the traditional andouille sausage with shrimp, a hybrid of chicken/sausage gumbo and seafood gumbo, we think it’s the best of both worlds.

A short history about Gumbo, is that the world itself derives from a West African word for okra, which is often included in the dish. I personally love adding okra but many people choose to omit. Roux, originating from French cuisine, is a simple flour and fat combination cooked over heat until desired level of color, a gumbo roux should always be dark in color. It always contains the Holy Trinity, which is bell pepper, yellow onion, and celery. Similar to the French mirepoix of carrot, onion, and celery, the Holy Trinity is the basis of all cajun cooking, included in dishes like jambalaya, étouffée, and red beans and rice. Gumbo is complex, yet simple. It requires patience to make and a whole lot of love. When the creoles in New Orleans made gumbo, it was a celebration of culture and family.

Now, the roots of Texas are rich and diverse in history, with many nations that led to the Republic of Texas and now, the U.S. State of Texas. Two of the six flags of Texas, are in fact, France and Spain. Creole people are early French or Spanish settlers of the U.S. Gulf states as well as  person of mixed French or Spanish background. So, gumbo may have not originated in Texas, but Texans love this culture all the same and pay homage to those early creoles that help build Texas into what it is today.

We hope that you enjoy making this very special recipe, as we know that you won’t regret making it and eating it until your heart is content!

Laissez les bons temps rouler!

Roux

  • 1/2 cup flour
  • 1/2 cup vegetable oil

Ingredients

  • 1.5 # large gulf shrimp, peeled and deveined
  • 14 oz andouille sausage, sliced
  • 1 green bell pepper, diced
  • 1 medium onion, diced
  • 2 celery stalks, diced
  • 4-6 garlic cloves, minced
  • 1 quart chicken stock
  • 2 bay leaves
  • 1 teaspoon cayenne
  • 1 teaspoon paprika
  • 1 teaspoon Italian seasoning, or equal parts thyme, oregano, & basil
  • 1/2 teaspoon black pepper
  • 1 teaspoon salt
  • 1 bag of frozen okra, 14-16 oz, or to your liking
  • 1 cup cooked long grain white rice

Instructions

  • Heat the vegetable oil in a large, thick-bottomed pot, such as a Dutch oven, on medium high heat, for a few minutes. Whisk in the flour and lower the heat to medium. Stir almost constantly, making sure to scrape the bottom of the pan as you stir. This part is very important, it is a process that cannot be rushed. to achieve the dark color desired, it takes about 30 minutes of stirring.
  • After the roux is to desired color, sauté the vegetables (bell pepper, onion, and celery), add the salt to this step to help sweat the vegetables. Stir until vegetables appear tender. Add garlic and continue to stir.
  • Add the chicken stock, remaining seasonings, andouille, shrimp. Let simmer for 15 minutes.
  • At this point, add the frozen okra and simmer for another 30. You can cook gumbo on a low simmer to develop flavor for as long as you choose, but at this point, everything is cooked.
  • Serve atop cooked white rice or mixed with rice, if you please!

Mama’s Mexican Chocolate Cake

I grew up eating this cake for every birthday. It was my Grandmother’s specialty and nothing beats it. She called it Mexican chocolate cake because it has a touch of cinnamon in it, however you can omit it if you choose. She would also use vanilla from Mexico, which makes it even more delicious. This cake is easy to make, and you may already have most of the ingredients in your pantry. This no fuss cake will have your guests raving, with little effort on your part. No messing with frosting spatulas or piping bags with this recipe, the warm icing just pours over and soaks into the moist cake a little bit, making for a scrumptious a comforting dessert for any occasion.

Ingredients

FOR THE CAKE

  • 2 cups all-purpose flour
  •  2 cups granulated sugar
  •  1 teaspoon baking soda
  • 1 tsp cinnamon
  •  1/2 teaspoon salt
  •  1 cup water
  •  1 cup salted butter
  •  6 Tablespoons unsweetened cocoa powder
  •  1/2 cup buttermilk
  •  2 large eggs
  •  1 teaspoon Mexican or regular vanilla extract

FOR THE ICING

  •  6 tablespoons milk
  •  4 tablespoons unsweetened cocoa powder
  •  1/2 cup butter
  •  3 1/2 cups powdered sugar
  •  1/2 teaspoon vanilla
  •  Pinch of salt
  •  3/4 cup chopped pecans, finely chopped

Instructions

  • Preheat oven to 350 degrees F. Lightly grease a large, rimmed 12×18-inch baking sheet (aka a half sheet pan).
  • In a large bowl, whisk together the flour, sugar, cinnamon, baking soda, and salt. Set aside.
  • In a saucepan over medium heat, combine the water, butter, and cocoa powder and bring to a boil, stirring to make sure there are no lumps.
  • Pour the chocolate mixture over the dry ingredients and stir until combined. 
  • Add the buttermilk, eggs, and vanilla, and mix until combined. You can do this with a hand mixer to make sure there are no lumps.
  • Pour the batter into the prepared pan and spread in an even layer. Bake for 18-20 minutes until the cake springs back lightly to the touch and has barely started to pull away from the sides of the pan. Do not overbake!
  • Icing:  When the cake is almost done baking, start to make the icing. In a medium saucepan over medium heat, combine the butter, cocoa powder, milk, and salt. Heat, stirring constantly, just until the mixture comes to a simmer.
  • Immediately remove from heat and add the vanilla, then whisk in the powdered sugar until the icing is smooth. Stir in the chopped nuts. If the cake isn’t ready yet, keep the icing warm and stir it every so often so it doesn’t harden on top.
  • Let the cake cool for 10-12 minutes, then pour the hot icing over the warm cake and spread it evenly with a spatula. Let the frosting set for 20 minutes before cutting the cake into squares. The frosting will completely set after 1-2 hours.
  • Serve the cake warm or at room temperature.